This section is divided into two parts. The first part explains how to digitize a LCZ polygon using Google Earth. The second part provides good practice guidelines for digitization. We suggest that you read the guidelines first and then try to digitize one polygon. Then continue to consult the guidelines as you digitize more polygons until you become familiar enough with the basic ideas to complete the task.
Download the LCZ template
- Use this template when using the LCZ Generator: WUDAPT_L0_Training_template
- Use this template when using the old SAGA GIS classification: WUDAPT_L0_Training_template 1-107
How to Digitize a LCZ Polygon
- Select the LCZ type subfolder that corresponds to the area you are going to digitize. For example, choose LCZ 1 or 2, i.e. areas with compact buildings.
- Turn on the measurement tab so that you can see the size of the training area.
- Select the Add –> Polygon tool and provide a unique label (e.g. LCZ1a where a represents the first polygon of this type).
- Digitize the area by outlining points that demarcate the boundary.
- Repeat the procedure several times per class. If a class has different appearances in your city make sure you cover all. As a rule, the more (and the larger) training areas for each LCZ type, the better for classification. A larger number of training pixels provides a better representation of the variety of spectral characteristics associated with a LCZ type.
- Once all training areas for this class have been completed, change the style setting for that LCZ type; right-click on the accompanying LCZ folder and select Properties > Style, Color > Share Style.
- Once done, open the folder and delete the Style Placeholder.
Have a look at this instructional video by Paul Alexander for more details on how to create training areas.
Guidelines for Digitizing Training Areas
These guidelines are organized into key points for LCZ digitization and some illustrative examples below regarding compact shapes; scale and borders.
Key Points
- Make sure you understand the LCZ concept as described here, and learn how to discretize between LCZ classes using the available LCZ Factsheets (Appendix G from Stewart (2011), Redefining the urban heat island, PhD thesis, University of British Columbia, Vancouver, Canada).
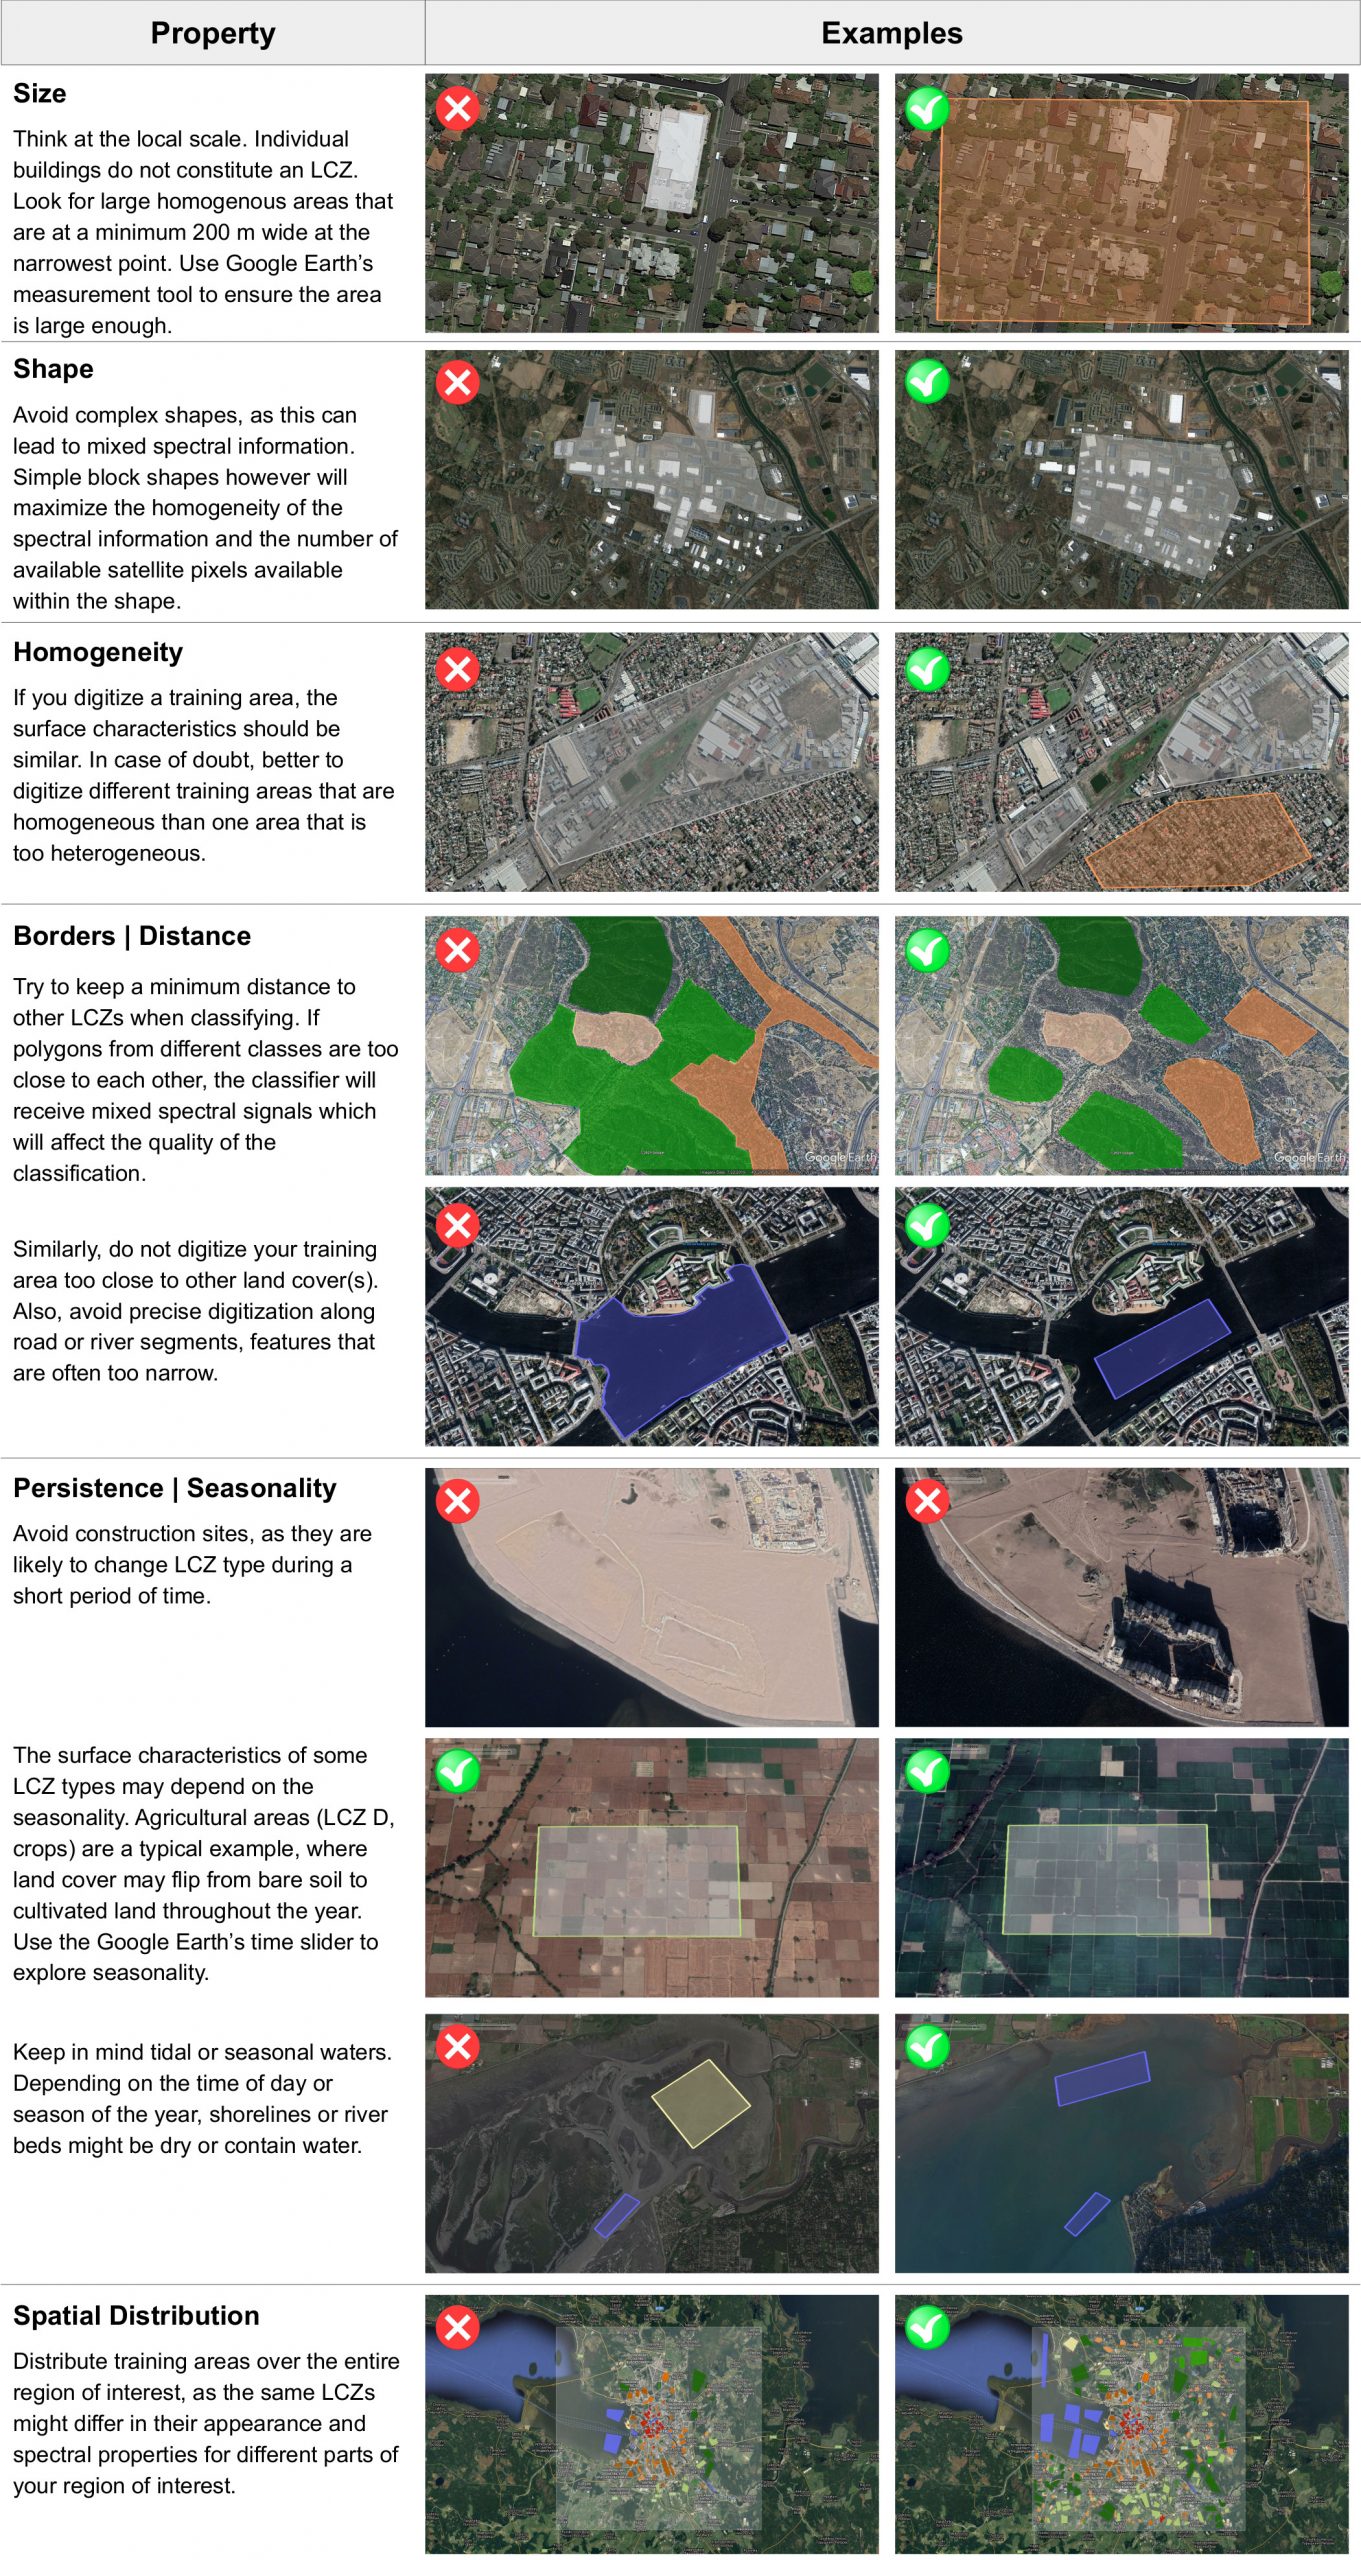
- The LCZ scheme describes homogeneous neighbourhoods with properties that are relevant to surface thermal climate at the local scale (i.e., hundreds of meters to several kilometers). Thus, look for large homogenous areas that are >200 m wide at the narrowest point (since the earth observation images used in LCZ classification have a pixel size of 100-120 m on a side).
- Do not digitize small side areas; think at the local scale.
- The geometric accuracy of the training area boundaries is not critical since the classification of Landsat images is based on a relatively coarse grid. Hence, leave a buffer of > 100 m between LCZs, if there is a clear boundary.
- There should be several examples (5-15) of each LCZ to help in the automatic classification; there will be variations between a LCZ type in different parts of the city (e.g. different roof colors or building materials) and in the same LCZ at different times of the year owing to vegetation status) so make sure to digitize examples.
- Ensure that the natural surface cover (e.g. dense trees) receives as much attention as the urban types; these types are needed to delineate the urban footprint.
- Digitize features that are fairly persistent over time, e.g. avoid construction sites, and be careful with agricultural land (should be LCZ D) and seasonal / tidal waters.
- Use Streetview and georeferenced images where available to confirm your categorisation of the neighbourhood.