- You will create the ROI in Google Earth so open this application now.
- To create the ROI, you will draw an area (known as a polygon) around the urban area so start by finding your city of interest.
- Click the Add polygon tool along the top bar. Once the New Polygon window appears, simply name the polygon ROI. A cross-hair (+) appears on the screen that moves with the movements of the mouse. Each time you left-click, a marker is placed on the map; each subsequent marker is attached to the previous marker by a straight line. Place markers on the image so that a ROI polygon is created.

Edit ROI in Google Earth
When selecting the ROI:
- It should contain the entire urbanized area with a buffer of about 20 km around this area. The ROI should not be smaller than 50 km in each direction.
- You might find it useful to switch the Borders and Labels layer on in Google Earth, but be aware that the administrative border might be smaller or larger than the urbanized area. Think of the greater urban region rather than just an urban core.
- You might consider using the ruler tool in Google Earth to measure the buffer.
- Change the Polygon style to transparent (right click on Polygon, Style, Color, change to outlined)
- It should have a rectangular shape but this need not be exact.
- If in doubt, always chose a larger area rather than a smaller one.
- Save the ROI as a KMZ file (right click on it, Save Place As …).
- Open the SAGA software if not already open from a previous step. Select (Geoprocessing -> File -> Shapes -> Import -> Import Shapes) from the main menu. Select the ROI kmz file and set Geometry Type to Automatic.
- Next, the ROI must be projected to UTM (the projection of the Landsat data). You can take the projection information directly from the Landsat data.
- To do this, open one of the Landsat Images you downloaded previously in SAGA (simply drag and drop the TIF file to the workspace).
- Then run Geoprocessing -> Projection -> Coordinate Transformation (Shapes)
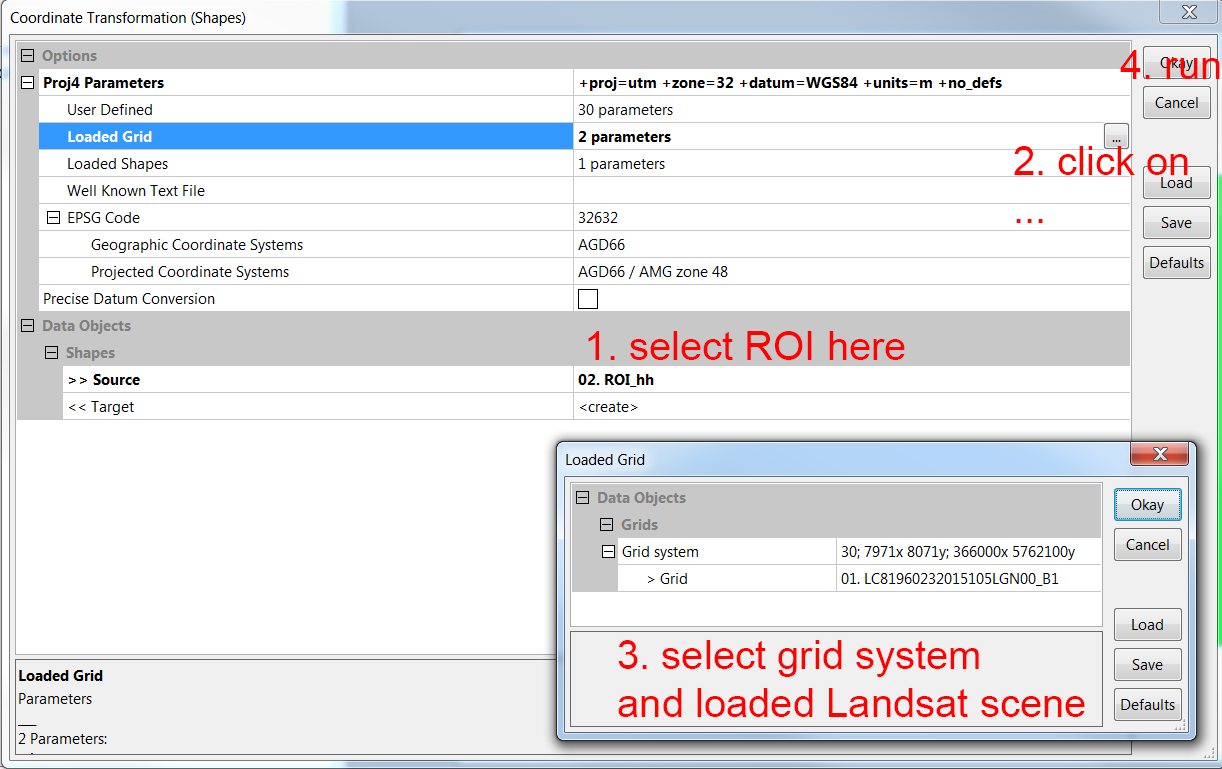
Projection of ROI to UTM
- Select the ROI as the Source.
- Use Loaded Grid for the projection parameters. Specify the grid system and the grid.
- Save the projected ROI as a shape file (right click on it, Save As …). We recommend that you close the non-projected ROI file to make sure you use the right one in the next step of the process.